About
Projects on the Open Impact Platform serve as structured environments for coordinating time-bound initiatives, collaborative workstreams, and measurable impact efforts. While Groups organize people around a shared context, Projects provide the operational layer where teams plan, implement, and track specific initiatives, deliverables, and outcomes. Projects are best suited for efforts that are time-bound, task-focused, and require measurable results. Groups may sponsor one or more Projects, allowing organizations to move from general coordination to specific execution while maintaining visibility and accountability. At a broader scale, networks using their own instance of the platform can host multiple organizations, which in turn can sponsor groups who facilitate projects—allowing for layered collaboration across an entire ecosystem. Each Project space includes:- Shared newsfeed for updates and announcements.
- Discussion spaces that allow collaborators to engage in topic-based dialogue. Like groups, these discussions are searchable and taggable, making it easy to organize knowledge, revisit decisions, and maintain continuity as projects evolve.
- Shared calendaring to coordinate meetings, milestones, and events, ensuring that collaborators remain aligned throughout the lifecycle of the work.
- Integrated project management tools to organize workflows, assign tasks, and track progress.
- Visual management tools including Gantt charts, timelines, and swimlanes.
| Use cases of Project spaces | |
|---|---|
| Convening internal teams and distributed workspaces Organizations create private Groups to coordinate staff teams, share internal updates, organize discussions, maintain shared calendars, and provide a central place for accessing documents and resources | |
| Organizing cross-organizational affinity groups or communities of practice Networks and coalitions establish Groups that bring together practitioners working in similar fields or thematic areas—creating spaces for dialogue, peer learning, and knowledge exchange across organizations | |
| Coordinating regional or place-based collaboratives Groups can serve as coordination hubs for regional partnerships, where community organizations and institutions communicate, share resources, schedule meetings, and organize collaborative efforts. These Groups can also sponsor Projects when partners are ready to launch specific initiatives or workstreams | |
| Hosting learning cohorts, fellowships, or program communities Program organizers convene participants within a Group space to share curriculum materials, post program updates, facilitate discussions, and support peer-to-peer engagement throughout the lifecycle of a program | |
| Engaging event participants before, during, and after gatherings Groups can be used to host event communities—sharing schedules, speaker materials, and event-related resources while enabling participants to connect, discuss session topics, and continue conversations after the event concludes | |
| Facilitating working groups within larger networks or coalitions Networks often create Groups around specific initiatives, policy efforts, or strategic priorities, allowing members to coordinate conversations, share updates, and organize collaboration around a defined focus area | |
| Creating ongoing spaces for dialogue and shared learning Groups can function as living forums where members exchange insights, share field updates, ask questions, and collectively explore emerging challenges and opportunities |
Quick Start
How to set up a Project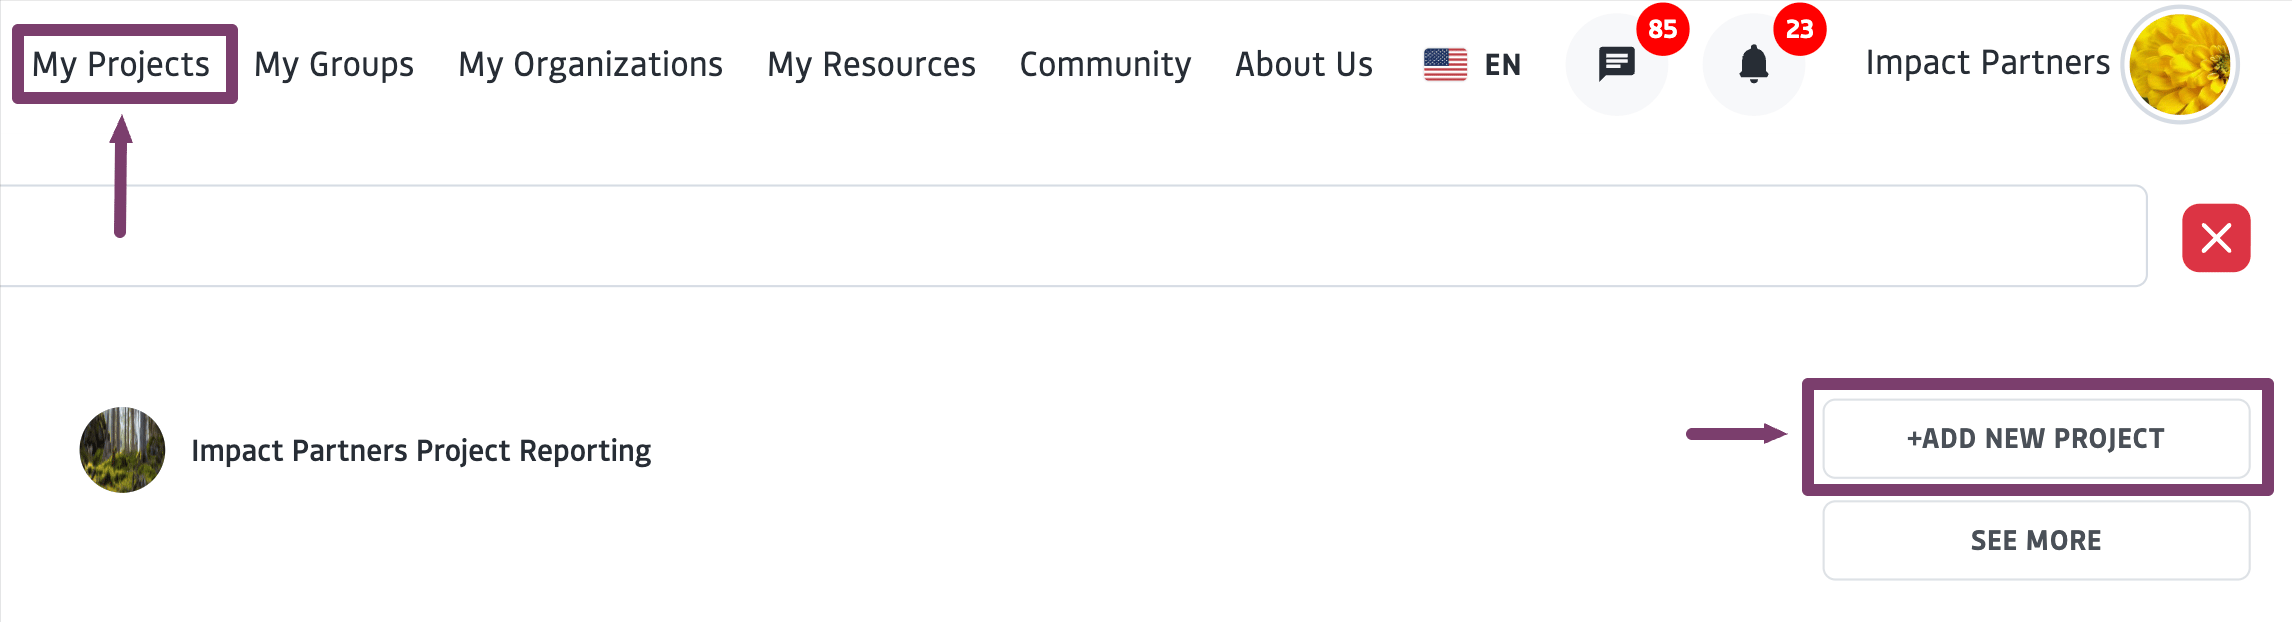
Follow the set up prompts to add details about your Project
- Managing Organization: Select the organization that will govern the project; they will be able to manage tasks, discussions, and calendar invites. They will receive a notification that they have been added and the project will appear under the selected organization’s project list and profile. Note that you must be connected to an Organization, or logged in as that Organization, for them to appear in this list.
- Project Managers: those project managers will be able to create and assign tasks, discussions, and calendar invites. They will receive a notification that they have been added.
- Sponsoring Group: You must be a creator or manager of a group to select it as a sponsor; the project will then appear on that group’s profile.
Addresses
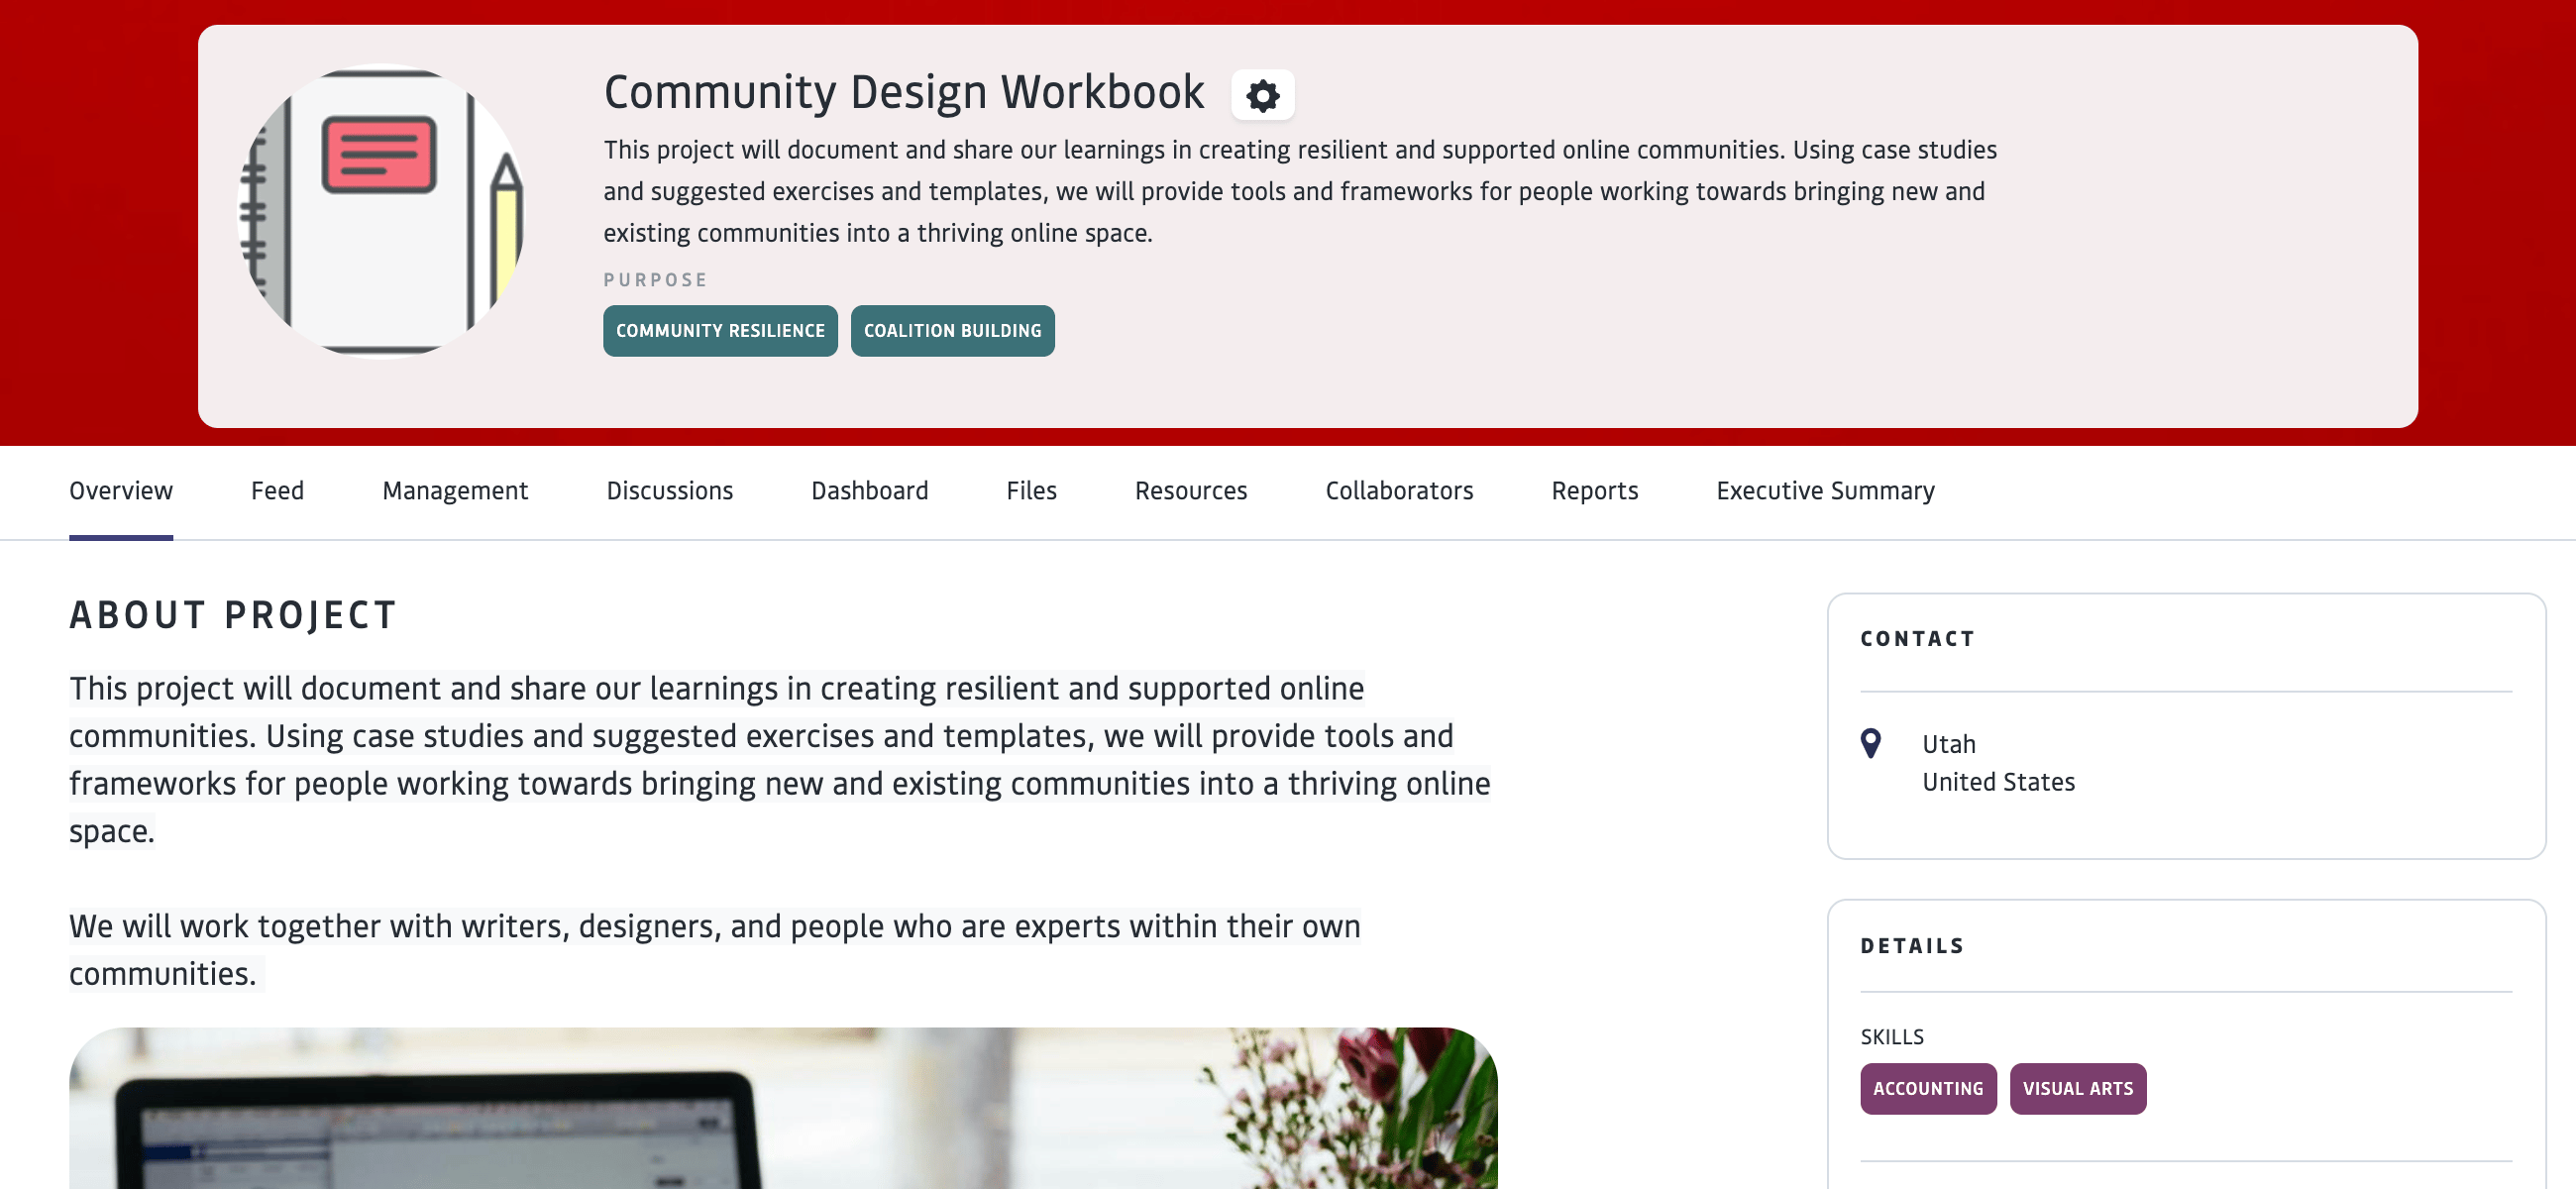
This is the projects’ address. The Country field is the only required field. The contact information entered here will appear on the Overview page. If you would like the location of your project to show up on the public map- you can select “use map” to find your location and drop and save a pin. Or you can select “get from address” and the system will generate a latitude/longitude coordinate that will ensure your project shows up on the map view.
Preferences
- If you will be tracking Measurable Results for the project, choose the applicable ones from the Results list along with the status tags you will use to manage tasks.
- Add your collaborators to the project. If you have not yet invited collaborators, please let the OFC team know and we can support you with an invitation code to invite collaborators to your project space.
Project Elements
Once a project is created, you can begin posting about the project or creating calendar events in the “Feed”, facilitating taggable conversations in the “Discussion”, and creating and assigning tasks from “Management”.Feed
The Feed is a dynamic space that displays a running set of posts, calendar events, and attachments associated with a specific area of the platform. It exists across projects, groups, and individual or organizational profiles. It serves as the primary hub for real-time coordination and communication. It allows users to stay updated on recent activities, track upcoming deadlines via the calendar, and manage active tasks without navigating to deeper project management layers A “Feed”:- Shows posts, calendar events, and attachments associated with the specific project or group.
- Allows you to create a post to share with other members of the group or project or comment on posts from other members. Posts can include images and links.
Discussion
Discussions are a dedicated space within Projects and Groups for creating and interacting with searchable, taggable topic threads. Discussions provide a long-term repository for ongoing dialogue, knowledge organization, and maintaining continuity as projects evolve. To Create a discussion in a project or group _The creator or a manager of a project or group can add new discussion threads. Ensure you have the correct permissions. _Click the ‘Add new’ button and fill in the fields
Add tags for the thread to be searchable by purpose, skills and knowledge. Consider what tags will make this thread most discoverable for other members.
- The creator of a group or project as well as managers are able to:
- Post new discussion threads and edit the discussions they create
- Moderate threads (including deleting comments)
- The creator of a group or project is also able to delete threads in the group or project they created, regardless of who created it.
Files
Files serve as a central repository for all documents, images, and media uploaded to or shared within a specific area of the platform, such as a project, group, or profile. Files appear in here after being attached to other objects, such as tasks, feed posts, or discussion threads. Files allows users to see what has been shared across a collective space, ensuring that everyone with the proper permissions has access to the necessary documentation Attaching Files You can attach files to other objects, such as tasks, feed posts, or discussion threads. Within these objects, you can upload a new file or select from existing. [see adding attachments] To Upload a New File You can upload a new file directly for later use through the Files in your own profile. Navigate to your individual profile, click on File, and select the “Add” button to upload a new file. _Note: The Files element in shared spaces, such as projects and groups are view only and show the files that have been uploaded for that space via objects like discussions and feed posts. _ Managing Files Next to the file name and type, select the gear icon to manage the file - download, preview, edit, privacy edits, or delete. Retroactive Privacy Changes Because a single file can be shared across multiple groups or posts, your individual profile’s Files element is the place to retroactively change privacy settings or delete a file globally File Privacy and Visibility File visibility is determined by granular privacy settings.- Inherited Permissions: Files often inherit the permissions of their “container.” For example, if you upload an image to a post shared with a specific group, members of that group will see that image in their Files ta
- Fine-Tuning: Users can set files to Public (anyone with the link), Private (only the owner/organization), Connections, or Custom (specific individuals or groups)
Resources
A resource is a curated, published container for knowledge, not just a file. It serves as a bundle of one or more files (such as workshops, recordings, or toolkits) that share an overarching theme, description, and point of contact. Publishing a resource provides context, attribution, and intentional sharing—so work can travel responsibly. Organizations can choose whether resources are publicly accessible, visible only to selected members, or shared within a specific Group context. Public resources are added to The Open Impact Resource Library, a curated, shared collection of practices, tools, and knowledge intended to support the wellbeing of the planet, people, and place. Learn about Resource Publishing →Calendar
The calendar is found in the Feed across platform areas, including groups, projects, and profiles. Assigned tasks with set start and end dates automatically appear on the calendar. When viewing a group, the calendar will display the events relevant to that group. It provides a shared space to coordinate meetings, milestones, and events, ensuring that collaborators remain aligned throughout the work lifecycle. Learn more about Calendars →Roles & Permissions
- Creator/Admin: The person who creates the project is the primary administrator. Currently, only the creator can edit the project description and manage overall membership settings.
- Project Managers: Designated managers can create and assign tasks, manage discussions, and send calendar invites. To add managers to a project, navigate to the project page, click on the gear icon in the banner, and then ‘Edit Project’. Add members from the Managers drop down. If someone you would like to assign as a manager is not appearing in this list, make sure they are in the managers list of a sponsoring Organization (which can be found under the Organization’s profile settings.)
- Collaborators: Members who participate in the workspace and can be assigned tasks. They must be a “Connection” of the creator before they can be added to the project via Preferences in the edit menu.