About
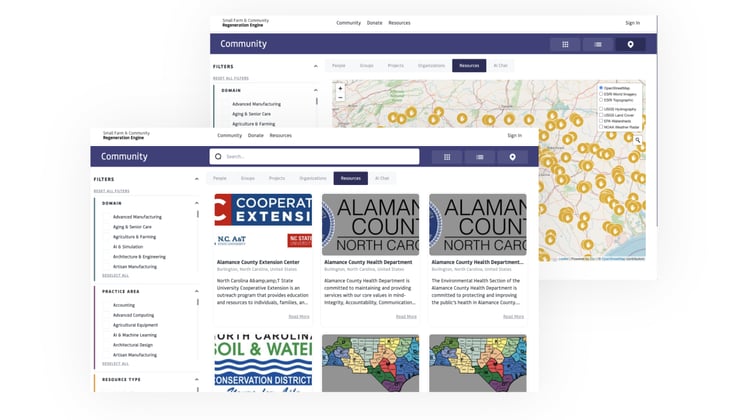
Think of a resource as a container for knowledge, not just a file. Publishing a resource provides context, attribution, and intentional sharing—so work can travel responsibly. Organizations can choose whether resources are publicly accessible, visible only to selected members, or shared within a specific Group context. Public resources are added to The Open Impact Resource Library (link), a curated, shared collection of practices, tools, and knowledge intended to support the wellbeing of the planet, people, and place. [link to info page about the resource library itself) Resources published through the tool may include: Practical tools, templates, and guides Project examples and implementation playbooks Training materials, frameworks, or research Curated links to external knowledge or supporting documentation The Resource Publishing Tool was developed to support organizations and networks in curating, contextualizing, and sharing knowledge within and across the Open Impact ecosystem. It allows members to publish a wide range of materials—from external web links and PDFs to images, videos, spreadsheets, reports, and templates—while providing descriptive context about how and why each resource is relevant. Resources can be published as individual files or as curated collections, such as toolkits or thematic libraries connected to a specific initiative, region, or program. Each resource can include contextual information, contact details, related websites, and even location-based data, making materials more discoverable and actionable. A key feature of the tool is flexible access control. Organizations can choose whether resources are publicly accessible, visible only to selected members, or shared within a specific Group context. This allows the tool to serve multiple use cases, including: Publishing public-facing resources for broader community benefit Delivering curriculum and materials within learning cohorts Supporting internal team collaboration Curating documentation and media within project portfolios Providing funders and partners with structured access to reports and impact materials Beyond supporting individual organizations, the Resource Publishing Tool contributes to a growing, shared knowledge commons across the Open Impact Platform. Through partnerships and cross-network collaboration, publicly available best practices, research, templates, and instructional materials are aggregated into a living library that strengthens collective learning and reduces duplication of effort. In this way, the tool functions not only as a publishing mechanism, but as infrastructure for shared knowledge stewardship—supporting transparency, visibility, and the co-creation of a collaborative impact ecosystem. Use cases of Resource Publishing| Building organizational knowledge libraries Teams curate internal collections of templates, guides, research, and operational documents so staff and collaborators can easily access shared tools and institutional knowledge | |
| Publishing public resource hubs Universities, NGOs, and regional initiatives publish publicly accessible research papers, toolkits, and public services to support practitioners and communities | |
| Supporting learning cohorts and program delivery Program facilitators curate curriculum materials, reading lists, and videos within a specific group context so participants can easily access learning resources | |
| Curating project documentation and supporting media Project teams attach reports, white papers, and multimedia files to project portfolios to provide additional context for partners and funders | |
| Sharing tools and templates across networks Networks and coalitions publish replicable tools—such as governance templates and facilitation guides—to support other organizations undertaking similar work | |
| Contributing to a shared knowledge commons Partners contribute research and case studies to a growing cross-network library, enabling organizations across the ecosystem to learn from one another and reduce duplication of effort | |
| Publishing location-based or contextual resources Organizations share resources tied to specific regions or communities, making it easier for users to discover materials relevant to their geographic focus |
Quick Start
How to create and publish a resource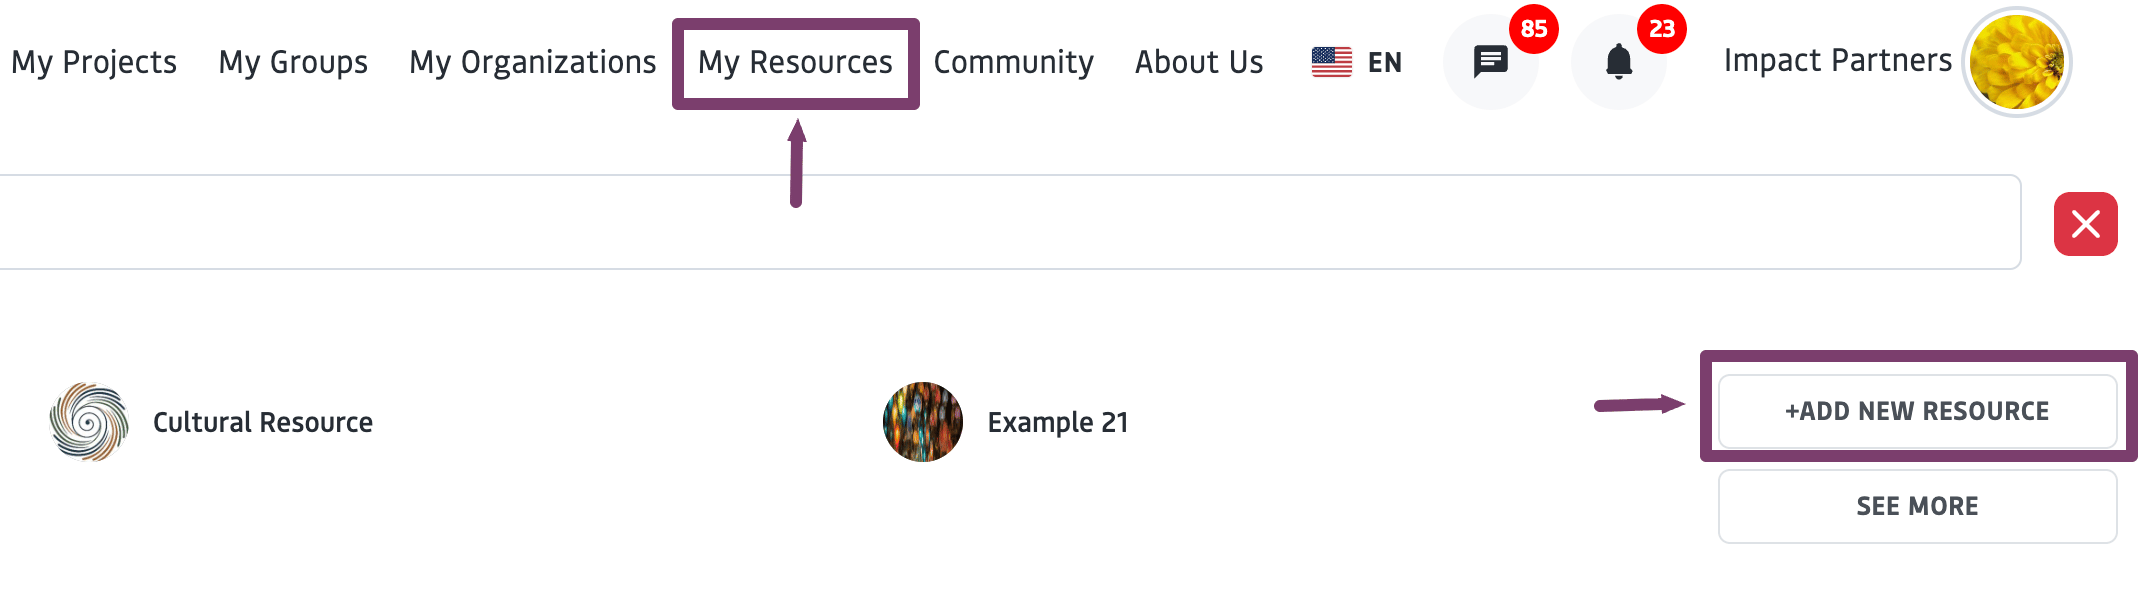
Set Description + Visibility & Privacy
Learn more about Privacy Settings
Attach Files & Links
Learn more about working with files
Submit vs. Publish: There is a critical distinction between these two steps:
- Submit: Finalizes the resource setup and makes the resource card visible where shared.
- Publish: Happens via the Publishing Wizard and controls whether the attached files are actually accessible to users.
Publishing Resources
This step controls the visibility of files that have been attached to your resource. After submitting a resource: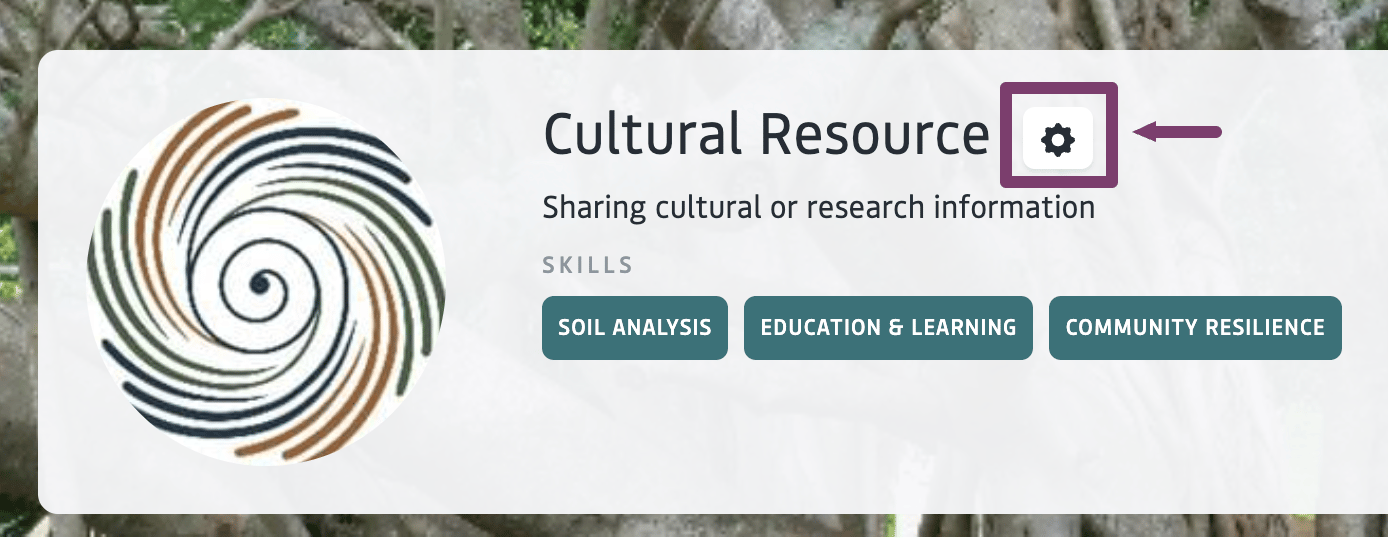
Select Publish Resource to open the Publishing Wizard
- Project Quality: leave as Standard → Save
- Project Questions:
- Keep Attach Resources selected
- Deselect In-kind value
- Deselect Additional Notes → Save
Settings to publish the File
- Leave file role set to Public
- Check Publish next to each file you want visible
- See more information on privacy settings below
- Optional: check Show in profile to feature it on your organization/profile page
Permissions and Privacy
The Privacy settings can be changed under ‘Description’ when editing the resources. This is the most important step for controlling visibility. Not all resources are intended to be public. The resource publishing tool supports graduated visibility, allowing authors and sponsoring organizations to decide:- Who can access a resource
- Where it appears
- How and when it is shared
- Yes – resource may appear in the public community library (subject to OFC review)
- No – resource remains hidden from the public library and is only shared in specific contexts
- Public – anyone with the link can view
- Private – only you or your organization
- Connections – visible to your connections
- Custom – share with:
- All groups
- Specific groups
- Specific individuals
- With “allow” or “not allow” rules
Working with Files
Each resource must have at least one file attached to submit and move on to the publishing step. Once you click the “attach” button,- From “files”, you may select new or existing files.
- Click “select” to choose from the list of existing files saved to your profile.
- Drag and drop a new file, or click within the drag & drop area, to select a file to upload from your device.
- Once all files are done loading, they will appear in a list with the words “ready to upload.” You may remove them by clicking the “x” icon.
- You may use the gear icon at the bottom of the window to select privacy for any new files you are adding, This will dictate how the files appear on “Files” of your profile to others. The default setting is public.
- Once your selected files finish loading, they will show as “ready to upload.” You may still remove files before uploading. Click “upload” to attach your files to the resource.
- From “link”, you may add a new link to your resource. (Note: you can re-point to previously used and saved links from the “files” tab, by choosing “select existing.”) Be sure to give your link a descriptive title, as it will be saved to your files.
- From “Spreadsheet” or “Web Docs”, you may create new attachments that will be saved to your files. These may be edited moving forward from the “Files” tab of your profile.
To make more advanced updates to individual files before publishing your resource, you may navigate to the “Files”of your profile. From here, you may change file names or modify file privacy.